在典型的可視化開發環境中,你能夠在應用程式中選中並且拖動一個對象在螢幕中來回移動。 Flex Drag and Drop管理器能夠讓用戶選中一個對象,比如List控制項的一個元素,或者一個控制項比如Image控制項,並且拖動他們跨過一個元素,放到另一個元素中。所有的Flex組件支持拖放操作。Flex在拖放方面對一些控制項,比如List,Tree和DataGrid,都有額外的功能支持。
拖放操作主要有3個階段:開始,拖動中,放下中。
開始階段
用戶通過使用滑鼠選中一個組件,或組件中的元素,然後按住滑鼠移動組件或元素移動,來發起一個拖放操作。例如,用戶用滑鼠選擇一個List控制項的元素,然後按住滑鼠左鍵移動幾個像素。這個被選擇的組件就叫做“拖動開始點”(drag initiator)。
拖動階段
當按住滑鼠按鍵,用戶在Flex應用程式中移動滑鼠。Flex顯示一個表示正在拖放的圖片,這個圖片代表拖放對象,就叫做“拖動代理”。DragSource對象包含被拖動的對象。
放下階段
當一個用戶移動“拖動代理”划過一個Flex組件的時候,這個組件就有可能變成“放下目標”。“放下目標”可以檢查“拖動源”,然後決定這個數據是否是一個“放下目標”(drop target)可以接受的格式,如果是,則允許用戶把數據放到它的上邊。如果不是,那么就不允許放到它上邊。
在一個成功的放下操作中,Flex輕易的就可以增加數據到目標中,並且把原數據刪除。
在本快速入門中,介紹了在Flex中幾種實現拖放操作的方式
使用列表控制項拖放
手工增加拖放功能
使用列表控制項拖放
幾個Flex組件具有支持內置拖放操作功能。他們是DataGrid, HorizontalList, List, Menu, PrintDataGrid, TileList, and Tree 控制項.
通過設定dragEnabled屬性為true,可以使這些控制項作為“拖動開始點”。類似地,通過設定dropEnabled屬性為true,可以使這些控制項作為“放下目標”。Flex允許通過拖動來移動元素,從dragEnabled控制項到一個dropEnabled控制項,或者在拖動中按住Control鍵可以賦值他們。
通過拖放操作複製元素
下邊的例子允許你通過拖放,從一個List控制項中複製元素到另一個List控制項中。你可以多次賦值同一個元素,從“拖動開始點”到“放下目標”。
<?xml version="1.0" encoding="utf-8"?>
<mx:Application
xmlns:mx="http://www.adobe.com/2006/mxml"
width="365" height="225"
creationComplete="creationCompleteHandler();"
>
<mx:Script>
<![CDATA[
private function creationCompleteHandler():void
{
srclist.dataProvider = ['Reading', 'Skating', 'Movies'];
destlist.dataProvider = [];
}
]]>
</mx:Script>
<mx:Panel title="Select activities" layout="horizontal">
<mx:VBox width="50%">
<mx:Label text="Available activities"/>
<!-- Drag initiator -->
<mx:List
id="srclist" width="100%" height="100"
allowMultipleSelection="true"
dragEnabled="true"
/>
</mx:VBox>
<mx:VBox width="50%">
<mx:Label text="Activities I enjoy"/>
<!-- Drop target -->
<mx:List
id="destlist" width="100%" height="100"
dropEnabled="true"
/>
</mx:VBox>
</mx:Panel>
</mx:Application>
結果
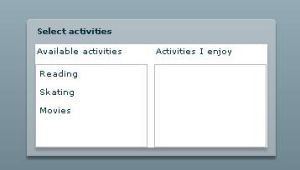 結果
結果通過拖放操作移動元素
默認的時候dragMoveEnable等於false,那么只允許你從過一個List控制項複製元素到另一個List控制項中。如果你修改該上邊的例子,在源List控制項中,增加dragMoveEnabled屬性,並且設定為true。那么就向下邊的例子那樣,可以移動和複製元素了。
默認的動作是移動元素,在拖動的過程中按住Control鍵,可以複製元素。
例子
<!-- Drag initiator -->
<mx:List
id="srclist" width="100%" height="100"
allowMultipleSelection="true"
dragEnabled="true"
dragMoveEnabled="true"
/>
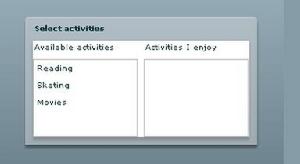 結果
結果雙向拖放功能
你可以允許雙向拖放,通過把兩個列表的dragEnabled和dropEnabled屬性都設定為true。就像下邊:
<!-- Both drag initiator and drop target -->
<mx:List
id="srclist" width="100%" height="100"
allowMultipleSelection="true"
dragEnabled="true"
dropEnabled="true"
dragMoveEnabled="true"
/>
<!-- . . . -->
<!-- Both drag initiator and drop target -->
<mx:List
id="destlist" width="100%" height="100"
allowMultipleSelection="true"
dragEnabled="true"
dropEnabled="true"
dragMoveEnabled="true"
/>
結果
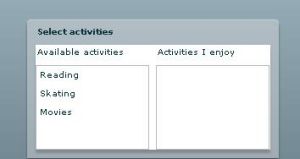 結果
結果手工添加拖放功能
想要讓非基於list的控制項或容器支持拖放操作,必須明確的添加一系列指定的類和方法。使用DragManager,DragSource和DragEvent類來實現拖放操作。
Flex應用程式使用時間來控制拖放操作。
拖動開始事件
當你把一個控制設定為“拖動開始點”,你可以使用mouseDown,mouseMove和dragComplete事件來管理拖放操作。
關於mouseDown和mouseMove事件
mouseDown事件在用戶用滑鼠選中並且按下滑鼠鍵開始分發。mouseMove時間在滑鼠移動的時候開始分發。
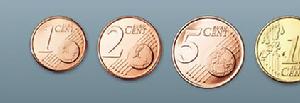
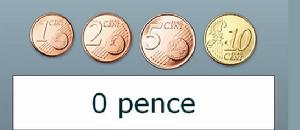
下邊的例子嵌入了4個歐元硬幣(1分,2分,5分,10分)圖片,兵器使用Image控制項顯示他們。在每一個Image控制項中,監聽mouseMove事件並且定義事件處理器方法,這個方法被命名為dragIt()。在dragIt()方法中,使用事件的currentTarget屬性,獲得事件源硬幣圖片的引用,然後吧這個引用放入到drageInitiator這個本地變數中。
下一步,創建一個DragSource實例,並且調用她的addData()方法來保存dragIt方法的value參數。使用字元串"value"來描述value參數的格式。一會,當你創建“放下目標”時,你將使用這個字元串,來檢查是否允許一個元素,放到某個組件上。
想要顯示一個硬幣圖片作為用戶拖動它的標誌,需要創建一個圖片實例,這個圖片與“拖動開始點”的圖片是一樣的。把這個圖片保存在dragProxy這個本地變數中。
最後,調用DragManager的靜態方法doDrag(),並且把圖片發生點,拖動源,事件對象,和拖動代理類傳送給它,開始拖動操作。
你可以隨意拖動硬幣,但是在任何地方都放不下它。因為你還沒有定義“放下目標”。下一節,將講述如何定義“放下目標”。
例子
<?xml version="1.0" encoding="utf-8"?>
<mx:Application
xmlns:mx="http://www.adobe.com/2006/mxml"
viewSourceURL="src/DragAndDropDragInitiatorEvents/index.html"
width="500" height="160"
>
<mx:Script>
<![CDATA[
import mx.managers.DragManager;
import mx.core.DragSource;
// Embed the various Euro coin images. Images originally
// from Wikipedia (http://en.wikipedia.org/wiki/Euro_coins)
[Embed("assets/1c.png")]
[Bindable]
public var OneCent:Class;
[Embed("assets/2c.png")]
[Bindable]
public var TwoCents:Class;
[Embed("assets/5c.png")]
[Bindable]
public var FiveCents:Class;
[Embed("assets/10c.png")]
[Bindable]
public var TenCents:Class;
private function dragIt(event:MouseEvent, value:uint):void
{
// Get the drag initiator component from the event object.
var dragInitiator:Image = event.currentTarget as Image;
// Create a DragSource object.
var dragSource:DragSource = new DragSource();
// Add the data to the object.
dragSource.addData(value, 'value');
// Create a copy of the coin image to use as a drag proxy.
var dragProxy:Image = new Image();
dragProxy.source = event.currentTarget.source;
// Call the DragManager doDrag() method to start the drag.
DragManager.doDrag(dragInitiator, dragSource, event, dragProxy);
}
]]>
</mx:Script>
<mx:HBox>
<mx:Image
id="oneCent" source="{OneCent}"
mouseMove="dragIt(event, 1);"
/>
<mx:Image
id="twoCents" source="{TwoCents}"
mouseMove="dragIt(event, 2);"
/>
<mx:Image
id="fiveCents" source="{FiveCents}"
mouseMove="dragIt(event, 5);"
/>
<mx:Image
id="tenCents" source="{TenCents}"
mouseMove="dragIt(event, 10);"
/>
</mx:HBox>
</mx:Application>
 結果
結果“放下目標”
一個放下目標可以使用多種事件,最重要的事件是dragEnter,dragDrop和dragExit時間。
dragEnter事件
dragEnter事件在帶有“拖動代理(drag proxy)”滑鼠從外部進入“放下目標”的時候分發。一個組件要作為“放下目標”必須定義這個事件監聽器。在這個監聽器中,你可以改變“放下目標”的外觀,從而向用戶提供一個反饋,表明這個組件可以接受拖動操作。例如你可以在“放下目標”周圍畫一個框,或者給“放下目標”一個焦點。
dragExit事件
dragExit事件在用戶滑鼠沒有在“放下目標”上放下,而是移除滑鼠的時候分發。如果在dragEnter或其他事件中修改了“放下目標”的外觀,你可以在這個事件中恢復到正常的外觀。
dragDrop事件
dragDrop事件在用戶在“放下目標”上放開滑鼠的時候分發。你可以使用這個事件監聽器向“放下目標”中增加drag的數據。
在下邊的例子中,創建一個Box容器擔當“放下目標”,並且定義dragEnter,dragExit和dragDrop事件監聽器。Box容器包含一個Label控制項,用來顯示放到Box上的硬幣的總和
在dragEnter事件監聽器中,檢查拖動源對象中是否包含value格式。只有對象包含這個格式才可以被放到這個“放下目標”上。如果包含,給用戶一個可視化的反饋,通過變粗Box容器的。通過調用DragManager的acceptDrapDrop方法,告訴DragManager,Box容器要接受這個“拖動開始點”。
在dragExit的事件監聽器中,恢復Box的外觀以表明“拖動代理”已經不在它上邊了。
最後,在drapDrop的事件監聽器中,當用戶把硬幣放到“放下目標”上時獲得調用,用硬幣的值增加totalValue的值,並且回復Box的外觀,以表明放下操作完成。
例子
<?xml version="1.0" encoding="utf-8"?>
<mx:Application
xmlns:mx="http://www.adobe.com/2006/mxml"
width="525" height="270"
viewSourceURL="src/DragAndDropDragDropTargetEvents/index.html"
>
<mx:Script>
<![CDATA[
import mx.events.DragEvent;
import mx.containers.Box;
import mx.managers.DragManager;
import mx.core.DragSource;
// Embed the various Euro coin images. Images originally
// from Wikipedia (http://en.wikipedia.org/wiki/Euro_coins)
[Embed("assets/1c.png")]
[Bindable]
public var OneCent:Class;
[Embed("assets/2c.png")]
[Bindable]
public var TwoCents:Class;
[Embed("assets/5c.png")]
[Bindable]
public var FiveCents:Class;
[Embed("assets/10c.png")]
[Bindable]
public var TenCents:Class;
[Bindable]
private var totalValue:uint;
private function dragIt(event:MouseEvent, value:uint):void
{
// Get the drag initiator component from the event object.
var dragInitiator:Image = event.currentTarget as Image;
// Create a DragSource object.
var dragSource:DragSource = new DragSource();
// Add the data to the object.
dragSource.addData(value, 'value');
// Create a copy of the coin image to use as a drag proxy.
var dragProxy:Image = new Image();
dragProxy.source = event.currentTarget.source;
// Call the DragManager doDrag() method to start the drag.
DragManager.doDrag(dragInitiator, dragSource, event, dragProxy);
}
// Called if the user drags a drag proxy onto the drop target.
private function dragEnterHandler(event:DragEvent):void
{
// Get the drop target component from the event object.
var dropTarget:Box=event.currentTarget as Box;
// Accept the drag only if the user is dragging data
// identified by the 'value' format value.
if (event.dragSource.hasFormat('value'))
{
// Make the border of the Box thicker to
// visually signal to the user that they can
// drop the coin there.
dropTarget.setStyle("borderThickness", 5);
// Accept the drop.
DragManager.acceptDragDrop(dropTarget);
}
}
// Called if the user drags the drag proxy away from the drop target.
private function dragExitHandler(event:DragEvent):void
{
// Get the drop target component from the event object.
var dropTarget:Box=event.currentTarget as Box;
// Set the border of the Box to its default value
// to visually indicate that the user is no longer
// over the drop target.
revertBoxBorder();
}
// Called if the target accepts the dragged object and the user
// releases the mouse button while over the drop target.
private function dragDropHandler(event:DragEvent):void
{
// Get the data identified by the color format from the drag source.
var value:uint = event.dragSource.dataForFormat('value') as uint;
// Add the value to the total
totalValue += value;
// Set the border of the Box to its default value
revertBoxBorder();
}
// Helper method to revert the Box's border to a 1 pixel outline.
private function revertBoxBorder():void
{
amountDisplay.setStyle("borderThickness", 1);
}
]]>
</mx:Script>
<mx:HBox>
<mx:Image
id="oneCent" source="{OneCent}"
mouseMove="dragIt(event, 1);"
/>
<mx:Image
id="twoCents" source="{TwoCents}"
mouseMove="dragIt(event, 2);"
/>
<mx:Image
id="fiveCents" source="{FiveCents}"
mouseMove="dragIt(event, 5);"
/>
<mx:Image
id="tenCents" source="{TenCents}"
mouseMove="dragIt(event, 10);"
/>
</mx:HBox>
<mx:Box
id="amountDisplay"
borderStyle="solid" bordercolor="#000000" backgroundColor="#FFFFFF"
width="100%" height="100" horizontalAlign="center" verticalAlign="middle"
dragEnter="dragEnterHandler(event);"
dragExit="dragExitHandler(event);"
dragDrop="dragDropHandler(event);"
>
<mx:Label text="{totalValue + ' pence'}" fontSize="48"/>
</mx:Box>
</mx:Application>
結果
 結果
結果