定義狀態過渡
通常在回響用戶操作時, 視圖狀態使您可以改變應用程式的內容和外觀。 改變視圖狀態時, Adobe® Flex® 會同時執行對應用程式的所有可視更改。 由於對視圖狀態的所有更改會同時發生, 用戶會看到應用程式從一種狀態跳到另一種狀態。
而您可能希望定義一個從一種狀態到下一種狀態的平滑的可視更改, 在其中更改是在一段時間上發生的。 過渡定義如何使對視圖狀態的更改看起來像是在螢幕上發生的一樣。 過渡是當視圖狀態更改發生時播放的組合到一起的一種或多種效果。
過渡不會替換效果;即, 您仍可以將單一效果套用到一個組件, 並通過使用一個效果觸發器或者 playEffect()方法來調用該效果。
您使用 <mx:Transition> 標籤來創建過渡並自定義它, 方法是通過使用其 fromState、 toState 和 effect 屬性。 fromState 屬性指定當套用該過渡時您要更改的視圖狀態, toState 屬性指定您要更改為的視圖狀態, 而 effect 屬性是對要播放的 Effect 對象的引用。
在過渡中, 可以通過使用 <mx:Parallel> 和 <mx:Sequence> 標籤引發並行或按順序播放的效果。
在下面的示例中, 您定義了一個任何時候狀態發生更改都會使用的過渡。 此過渡是由一種並行效果組成的。 並行效果也是一種複合效果, 因為它包含其他效果。 在此示例中, 並行效果包含一個調整大小效果和一個順序效果。 並行效果的子效果全部在同時運行。
執行調整大小效果會花費 500 毫秒, 且該效果使用一種簡易的功能使得在調整大小時該面板會彈出。 順序效果也是一種複合效果。 與並行效果不同, 順序效果的子事件按它們被添加的順序, 一次運行一個。 下面的示例中的順序效果包含兩個模糊效果。 模糊效果會模糊其目標組件並可以用於創建速度感或表示焦點的增益或損失。
示例
<?xml version="1.0" encoding="utf-8"?>
<mx:Application
xmlns:mx="http://www.adobe.com/2006/mxml" verticalAlign="middle"
width="340" height="250"
viewSourceURL="src/DefiningStateTransitions/index.html"
>
<mx:Script>
<![CDATA[
// You need to import easing classes even if
// you're going to use them only in MXML.
import mx.effects.easing.Bounce;
]]>
</mx:Script>
<!--
Use the transitions property (array) of
the Application class to store your transitions.
-->
<mx:transitions>
<!--
The "*" indicates that the transition should be applied
to any changes in the view state. You can set either
property to "" to refer to the base view state.
-->
<mx:Transition fromState="*" toState="*">
<!-- Parallel effects execute in unison -->
<mx:Parallel targets="{[loginPanel, registerLink, loginButton, confirm]}">
<mx:Resize duration="500" easingFunction="Bounce.easeOut"/>
<!--
Sequence effects execute in turn. The effects
in this sequence will only affect the confirm FormItem.
-->
<mx:Sequence target="{confirm}">
<mx:Blur duration="200" blurYFrom="1.0" blurYTo="20.0" />
<mx:Blur duration="200" blurYFrom="20.0" blurYTo="1" />
</mx:Sequence>
</mx:Parallel>
</mx:Transition>
</mx:transitions>
<!-- The states property of the Application class
defines the view states. -->
<mx:states>
<!--
The "Register" state is based on the base state.
All states are based on the base state by default
so you can leave out the basedOn property.
-->
<mx:State name="Register" basedOn="">
<!-- Add a FormItem component to the form. -->
<mx:AddChild
relativeTo="{loginForm}"
position="lastChild"
creationPolicy="all"
>
<mx:FormItem id="confirm" label="Confirm:">
<mx:TextInput/>
</mx:FormItem>
</mx:AddChild>
<!-- Set properties on the Panel container and Button control. -->
<mx:SetProperty target="{loginPanel}"
name="title" value="Register"/>
<mx:SetProperty target="{loginButton}"
name="label" value="Register"/>
<!-- Remove the existing LinkButton control. -->
<mx:RemoveChild target="{registerLink}"/>
<!--
Add a new LinkButton control to change
view state back to the login form.
-->
<mx:AddChild relativeTo="{spacer1}" position="before">
<mx:LinkButton label="Return to Login" click="currentState="""/>
</mx:AddChild>
</mx:State>
</mx:states>
<mx:Panel
title="Login" id="loginPanel"
horizontalScrollPolicy="off" verticalScrollPolicy="off"
>
<mx:Form id="loginForm">
<mx:FormItem label="Username:">
<mx:TextInput/>
</mx:FormItem>
<mx:FormItem label="Password:">
<mx:TextInput/>
</mx:FormItem>
</mx:Form>
<mx:ControlBar>
<!--
Use the LinkButton control to change to
the Register view state.
-->
<mx:LinkButton
label="Need to Register?" id="registerLink"
click="currentState="Register""
/>
<mx:Spacer width="100%" id="spacer1"/>
<mx:Button label="Login" id="loginButton"/>
</mx:ControlBar>
</mx:Panel>
</mx:Application>
結果
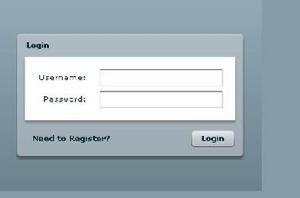 結果
結果